

iTunes Dark Mode – Definitive Guide
If you’re a fan of dark mode, you’ll be excited to learn that iTunes now has a dark mode too! In this article, we will show you how to enable it on both Windows 10 and Mac. We’ll also show you how to make iTunes black instead of white if that’s more your style. So whether you’re on a PC or a Mac, follow these simple steps and enjoy iTunes in all its dark glory!
What Is iTunes
iTunes is a must-have program for Apple products if you want to be able to listen to music, watch movies, buy some applications, etc. It is available on both Windows and Mac, and it’s free to download.
What Is iTunes Dark Mode Feature
Since we are watching movies and using our gadgets in the evening as well – it can be quite uncomfortable to use it in super bright mode. So, in this case, developers make it real to have a dark mode on iTunes.
If you are a person who uses iTunes every evening – this feature will be very helpful. Why? It’s because you can avoid your eyes from getting strained, so you can feel comfortable during late-night jobs, etc.
How To Use iTunes Dark Mode – Different Ways
Since iTunes Dark Mode is available on different platforms – we will describe how to turn it on in different ways: on Mac, on Windows 10, etc.
How To Use iTunes Dark Mode on Windows 10
This way is easy because Windows computers already have a built-in dark mode for the whole system. So, let’s take a look at the steps you need to do for iTunes Dark Mode on Windows 10:
- Find “Settings” using the search bar on your Windows device;
- Going further, click on Personalization settings. You will see a paintbrush on your screen;
- Choose “color” option;
- Choose your app;
- Now it’s the moment to choose the dark mode option. After that, you can preview the result, and choose the accent color, which is located at the top of the “color” section.
Finally, just go ahead and turn on your iTunes app. You will see the result immediately.
How To Use iTunes Dark Mode On Mac
Apple added dark mode to macOS Mojave. So, now you can use it on all your apps easily. Let’s see how to use iTunes dark mode on Mac:
- Find the Apple logotype in the top left corner of your screen and click on it;
- Now find “System Preferences”;

- Next, click on the “General” option;
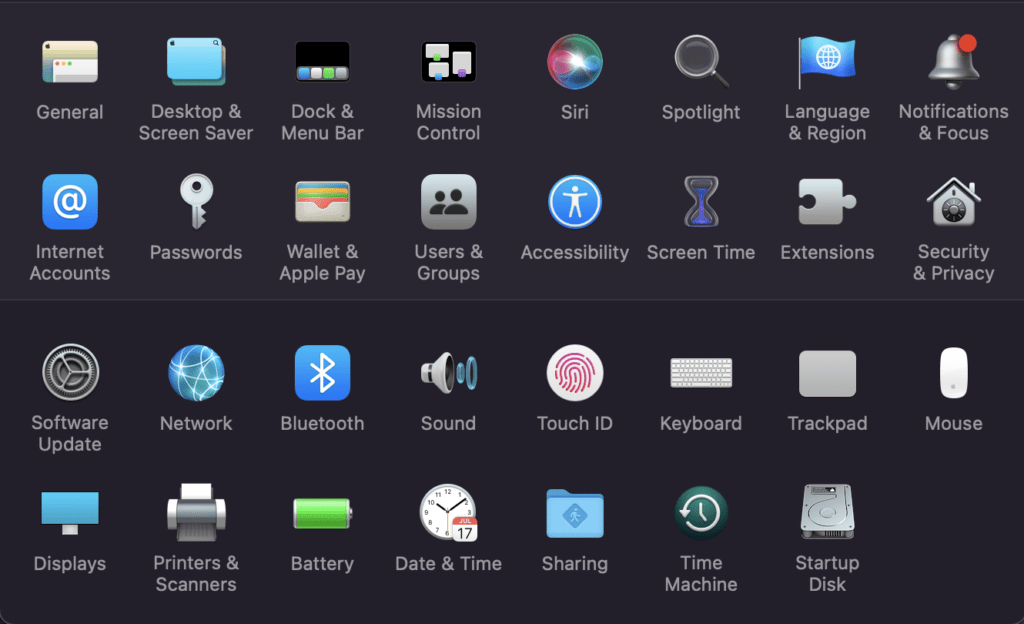
- Now, find the Appearance menu;
- Select the “dark mode” option;

- If you are using macOS Catalina – you can also use the automatic Dark mode option. This will turn off the light as soon as the evening starts, but during the day it will be the standard light theme.

What To Do If iTunes Dark Mode Is Not Working
In some cases, the options described above can’t work perfectly. Just try to find some repair tools on the market to fix that issue. You can try Tunescare or iMyFone TunesFix. The last one is working easily:
- Install software;
- Launch it, and it will automatically detect issues with iTunes on your computer;
- Click the “Repair” option on the dark mode issue.
Pros And Cons Of iTunes Dark Mode
We think that each feature has its own set of benefits and drawbacks. iTunes dark mode is not an exception, and let’s see why you should use it, and are there any reasons to avoid it.
Pros
- You can save your eyesight because it’s not as bright as the standard mode;
- It’s perfect for nighttime usage;
- You can use it on different platforms;
- It’s available in macOS Mojave and Catalina.
Cons
- Some users have complained about the glitches in the dark mode;
- It’s not available on all devices;
- Scattering of light near the letters, so you can feel some difficulties while reading;
- Pupil dilation can lead to blurred vision.
Conclusion
We think that the pros outweigh the cons, and we highly recommend using iTunes dark mode. It will make your evening usage much more comfortable, and it’s available on different systems. Just try it! Also, check out our latest post regularly.